Wiring an LED
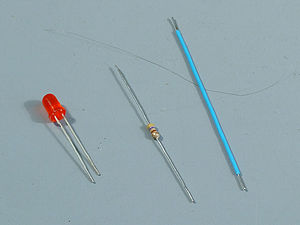
To wire up an LED you need an LED, a breadboard, some wires, and an appropriate resistor (in this case, a 470 ohm resistor (color code: yellow-violet-brown)). A resistor is an electronics component that limits the flow of electricity. This is important because some components, like LEDs, are only able to take so much power flowing through them before they are damaged. To prevent this damage a resistor is used to limit the current flowing through the LED.
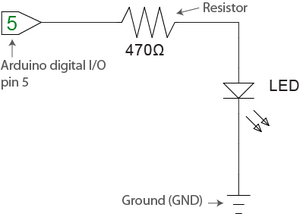
Wiring up an LED is very simple. For this circuit, all you need to do is connect one lead of the resistor to digital pin 5 on the Arduino. Connect the other lead of the resistor to the anode lead of one of the LEDs, and then connect the cathode to ground.
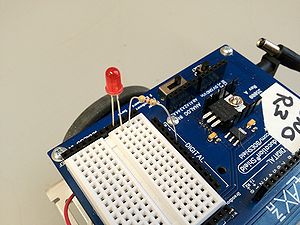
To make this easier, we will use the breadboard.

Understanding the Circuit
The Arduino digital pin in this circuit will be configured as an output, which for this setup can be thought of as connecting the circuit to the power when set to high, or disconnecting it when set to low. When it is connected the current will flow from the pin through the resistor, then the LED, finally ending at the ground connection.
In electronics, the ground connection refers to the voltage supply connection that has 0 volts. In the case of the Arduino, the main power supply provides 5 volts. However, the LED requires about 2 volts across the leads, not the 5 volt output from the pin. This is where the resistor comes in to play.
For a series circuit (the components are connected one after the other), the sum of the voltage drop (voltage drop - the amount of voltage used by a component. it is the difference in voltage across the connections) across each component must be equal to the source voltage, which in this case is 5 volts. Since the LED needs 2 volts the resistor must have a voltage drop of 3 volts. Additionally, for series circuits, the current (amperes or amps abbreviated as A) flowing through each component in the circuit is the same.
Based on these properties it is possible to calculate the required resistance of the resistor using R =(Vs-Vl)/I, where Vs is the supply voltage, Vl is the voltage drop across the LED, I is the desired current flowing through the LED, and R is the resistance value of the resistor. We already selected the 470 ohm resistor because it provides a nice safety range for variances of the components.