Removing Configuration
Open the Motors and Sensors Setup and remove unused sensors. Try it!
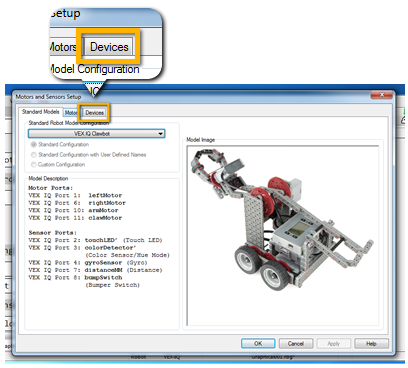
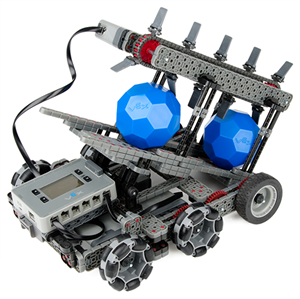 This is the robot that appeared in this lesson's video.
By default, this robot uses 4 motors to operate, so the sensors configured by default are not necessary. Also, when you download a program to your robot, ROBOTC may warn you about any sensors that are configured but not physically connected. |
|
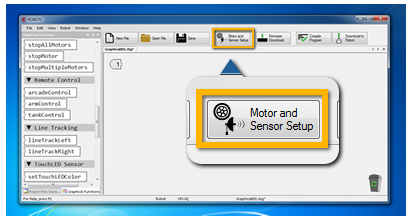 |
Open the Motor and Sensor Setup by clicking on the
"Motors and Sensor Setup" button at the top of ROBOTC.
Note: This button is visible only when you have a program open. |
 |
On the Motors and Sensors Setup window, click and open the "Devices" tab. |
|
On the Devices tab, look for sensors that you do not need.
For example, to remove the Touch LED, click on "Touch LED" in the dropdown menu, listed under 'Sensor Type'. Then, select No Sensor. 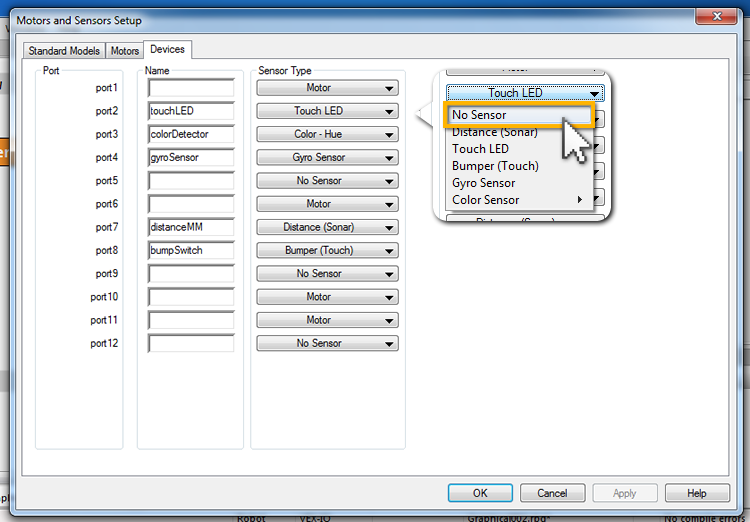
Repeat this for other sensors that are not connected on your robot. |
|
Changing Default Configuration
Open the Motors and Sensors Setup and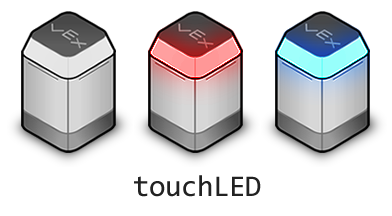 |
Touch LEDs would be a valuable addition to the Conveyorbot. Touch LEDs can be set to output many different colors. You can use them to show which part of the program your robot is running! Complicated robot designs often restrict you physically from attaching sensors freely. In cases like this, changing the sensor's default port can be useful. |
 |
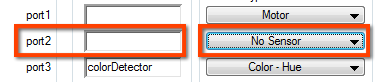
In the Devices tab of the Motors and Sensor Setup window, look for sensor name "touchLED". You will see that it is configured in port 2. Multiple of the same type of sensor, including the Touch LED, can be connected to a robot, but we will move the configuration from port 2 to another open port. |
 |
You wouldn't want to replace to a port that is
already occupied.
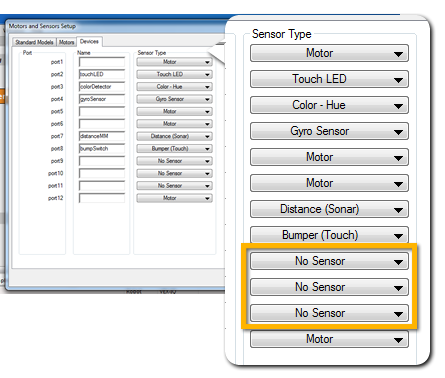
Look for ports that are empty (marked as "No Sensor") or ports using sensors that you do not need. |
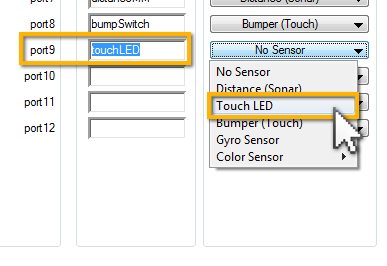 |
Choose port 9, which is empty, type "touchLED" as name of the sensor, and select "Touch LED" from the dropdown menu. |
 |
Make sure port 2 is now empty and set as "No Sensor". Click on the Apply button on the Setup window to complete the change. |
Changing Arm Motor Ports
Configure the conveyor belt motor on the correct port,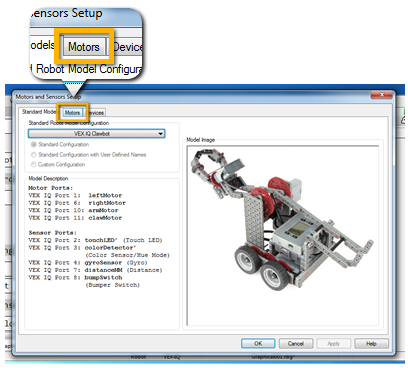 |
On Motors and Sensors Setup window, click and open the "Motors" tab |
|
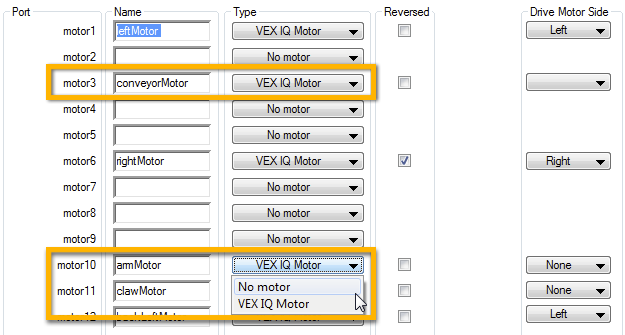
On the Clawbot IQ, the arm and claw motors are in ports 10 and 11. On Conveyorbot, the conveyor belt motor is in port 3. Configure the conveyor belt motor on motor port 3 by typing the name "conveyorMotor", and selecting "VEX IQ Motor" from the dropdown menu. Remove the configuration for the arm and claw motors, by selecting "No Motor" from the dropdown menu on ports 10 and 11. |
|
Any time you configure a motor that is part of a robot arm, set the motor's Drive Motor Side to "None".
This will prevent that motor from being controlled by
drivetrain-specific blocks like Forward, Backward and TurnRight. |
|