Right Turns?
Does the same waitUntil Command block work for right turns?
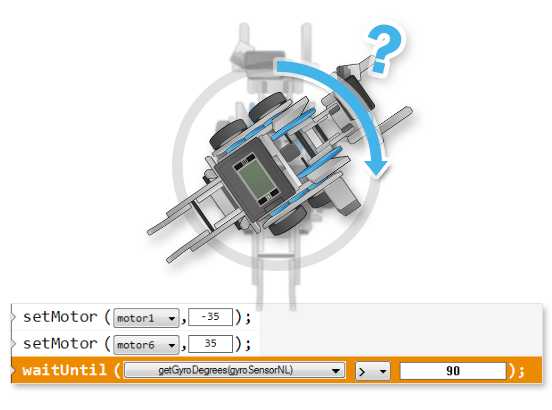
Hint: To turn right, the left motor (motor1) should spin forward (positive power),
and right motor (motor6) should spin backward (negative power).
Make these changes to the part of your program as shown below.
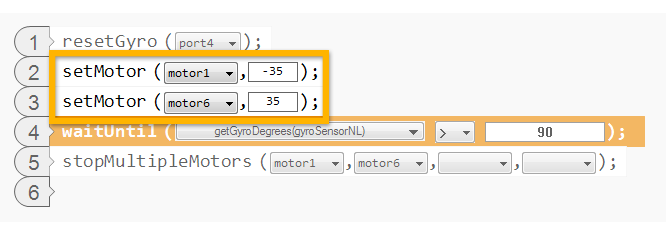
| The robot spins forever! See the next Mini-Challenge to find out why... |
Mini Challenge 1: Right Turns!
When the robot spins to the right, the gyro counts down, not up.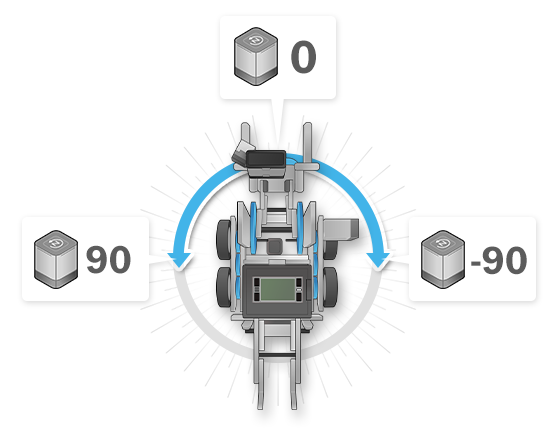
To turn 90 degrees to the right, you will need to adjust your waitUntil
command so that it
waits for the Gyro Sensor’s value to pass -90 as it counts downward.
|
To turn to the right, run the left motor forward (positive power), and the right motor backward (negative power).
"Passing” -90 counting downward would mean that the number has gone below -90, thus “less than -90”.
Adjust your waitUntil command block to waitUntil the gyro is less than (<) -90.
Mini Challenge 2: Gyro Lap
Using Gyro Sensor, you can program your robot to make more accurate turns. This means you can reduce the amount of error even if you make the robot turn multiple times in a single run!
|
Can't remember how to control the TouchLEDs? Review it again from Page 3 of the Touch Sensor chapter.
The value 0 on the Gyro Sensor is always in reference to its original direction. If the first turn leaves the robot facing "90" degrees, what will a second 90 degree turn need to turn to?
The second turn will need to turn until the Gyro Sensor reads 180 degrees (90+90). What about the third and fourth?
The third turn will need to go until the Gyro Sensor reads 270 degrees, and the fourth will need to go until it has reached 360.
Did you know?
How Gyro Sensor Works|
The VEX IQ Gyro Sensor is a MEMS Sensor (Micro- ElectroMechanical System) |
Did you know?
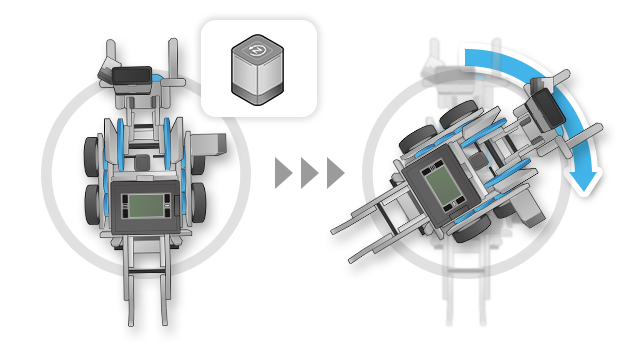
turnLeft/turnRight with Gyro Sensor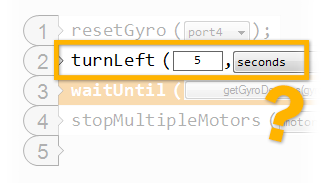 |
Why can't a programmer cannot just use the turnLeft and turnRight commands with the Gyro Sensor?
|