- :-

Topics Covered

  • setMultipleMotors Command Block
  • stopMultipleMotors Command Block
  • waitUntil Command Block
  • Lesson Links

    Check Your Understanding:
    1. 1. What does the setMultipleMotors command block allow you to do?
    2. Turn up to 4 motors on at a specific power
      Turn up to 4 motors on for a certain number of rotations
      Turn up to 4 motors on until the Touch Sensor is triggered
      Combines with the next block to make a special command
    3. 2. What does the stopMultipleMotors command block allow you to do?
    4. End the program
      Wait for the Touch Sensor to be pressed
      Wait for the Touch Sensor to be pressed, then turn the motors off
      Turn up to 4 motors off
    5. 3. What does the waitUntil command block allow you to do?
    6. Force the robot to stop until what the command is set to wait for has happened
      Allow the robot to keep doing what it was doing until what the command is set to wait for has happened
      Wait for an until command block to be processed before moving on
      waitUntil is not a valid name for a command
    Try It!
    Try it! 1

    Already Pressed

    What happens if you’re already holding down the Touch Sensor’s button when you start running the program? Try it!

    What happens?

    The robot detects that the sensor is pressed and passes control to the StopMultipleMotors block.

    “Pressed” simply means “the button is in the pressed position”; it does not matter how or when it was pressed in!

    Try it! 2

    EV3 Buttons

    The 5 buttons on the front of the EV3 (not counting the Cancel button) can be used as Touch Sensors too! Switch the "waitUntil" pulldown option to one of the "EV3 Buttons." Try it!

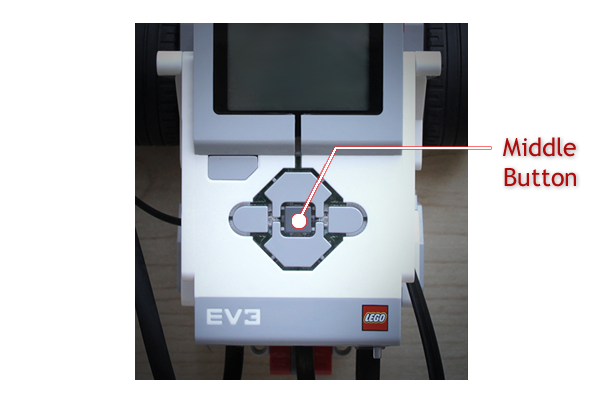
    Once it’s running, press the middle button on the front of the EV3!

    What happens?

    The Wait Block now waits for the middle button on the EV3 to be pressed. The robot then moves.

    Try it! 3

    Forward Until Release

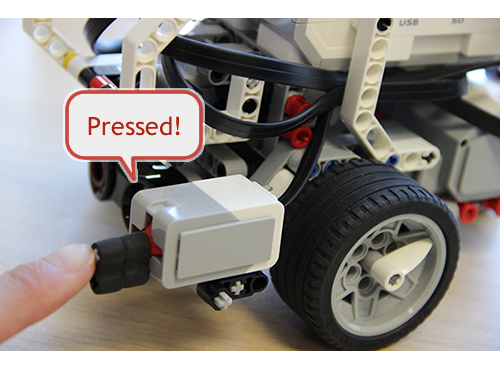
    The waitUntil control block can wait for the sensor to be “Released” as well as “Pressed”.

    What happens if you set the waitUntil control block to “0” and run it with an empty box holding down the sensor? Try it!

    What happens?

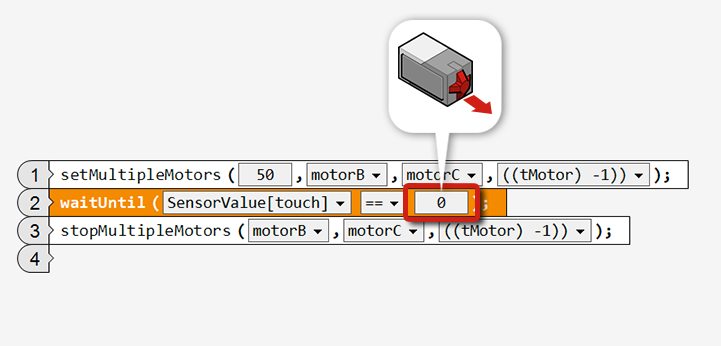
    The robot moves forward until the Touch Sensor is “Released”, then stops.

    Mini Challenge

    Mini Challenge 1: Vacuum

    Program the robot to touch all four walls of a room, using its Touch Sensor to know when it has reached each wall.

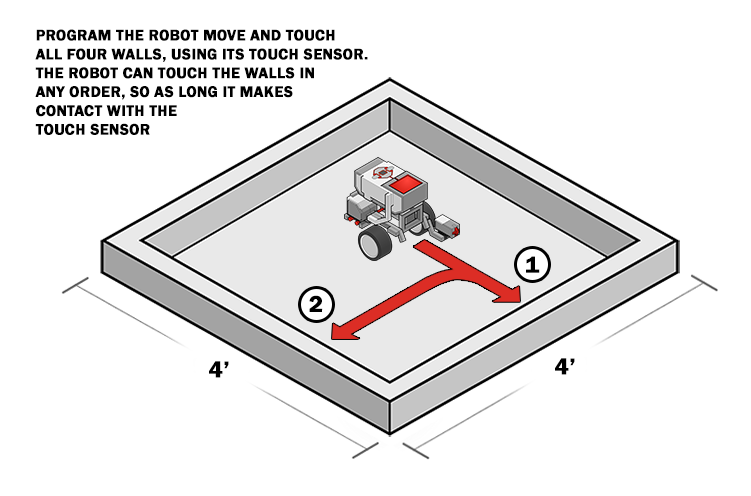
    Make sure the Touch Sensor is positioned so it can detect when the robot reaches a wall.

    The room is rectangular, so each wall is a 90-degree turn from the last.

    Some fine tuning may help, such as slowing movement speeds, pausing after a turn, or backing away from a wall before turning.

    + hint
    Did You Know?

    Did you know?

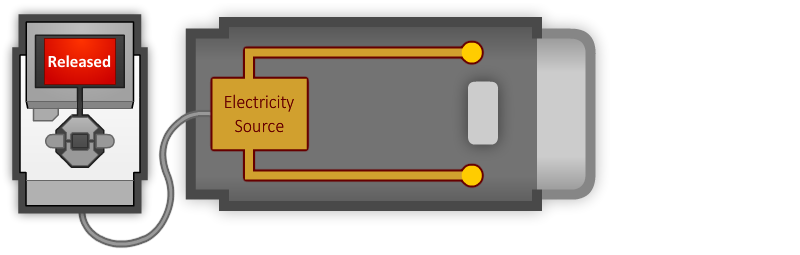
    How the Touch Sensor Works?
    When the Touch Sensor is pressed, it closes an electrical circuit, allowing current to flow.
    If the Touch Sensor is released, the circuit is broken and no current flows.

    The flow (or lack) of current is detected by the EV3, allowing it to determine the Touch Sensor is pressed.